Note: Batter composition, thickness of wafer and baking temperature determines the baking time.
3.2 When the desired temperature is reached set the thermotrol setting of the control box to 70 to 80.
3.3 Thermotrol regulates the time for which the power is to be supplied to the heating element.
3.4 Dip the dosimeter cups in the batter tank and put it on the bracket provided for in the tank.
3.5 The excess batter drains off leaving the desired quantity.
3.6 The quality can be adjusted by means of a screw provided near the lever. The handle raises or lowers the sliding lever which in turn reduces or maintains the quantity the remains in the cups.
3.7 Test if the correct baking temperature is reaches with a trial a small quantity of batter is poured an to the plates.
4.0 Advice on Maintenance & Precautions
4.1 Burnt sugar and fat particles leave a brown crust on the surface of the baking plate when the machine has been in use for a long time. These burnt remnants have to be removed with a normal brass wire brush. In case it is not done regularly, the carbon build up will retard the baking period.
4.2 Never use a wet cloth for cleaning the plates.
4.3 Operational Precaution
4.3.1.Never leave the machine in an "On" position unattended.
4.3.2.Always brief the operator on the standard procedures
4.3.3.Use the side handle only to lower and raise the UPPER tong.
4.3.4.In case after the batter is deposited on the plate the lock does not operate to close it in the first instance DO NOT try to use force to close the tong.
4.3.5.In case any spare part is used in the machine, please ask for additional spare to ensure continuity in operation.
5.0 Batter Recipe
5.1 It is up to the user of the machine to find out the most favorable batter recipe, since customer's taste with regards to colour, taste and hardness of wafers, differ from place to place.
5.2 See Annexure for a sample Wafer Batter recipe.
Adjustment For Wafer Sheets
Check the thickness of the wafer sheets for even thickness. In order to check the thickness of the wafer sheet collect the produce of each wafer tongs separately then measure the sheets one by one with a thickness gauge/or an accurate verities on all four corners and in the middle and make a note of actual differences.
Method A
The thickness of the wafer sheet can be adjusted by means of the fastening bolts of the baking plates.
First loosen all bolts (M10) [not the four threaded bushings (M20).]
Turn the treaded bushings on the corner that needs to be adjusted either clockwise (=thinner) or counter clockwise (=thicker). 1/6th of a turn equals to 0.2 mm and a full turn equals to 1.25mm.
After adjustment tighten the bolts (M10) on all four corners again. Then tighten the remaining threaded bushings carefully until they touch the plates and lock with the bolts.
Any such adjustment has to be done with utmost care otherwise the baking plates may get bent and warped.
After adjustment another trial round of wafer sheets has to be produced and measured again.
Method B
Place four metal strips or shims of the desired thickness of wafer (minus the engraving thickness) on the baking plates
Then all set bolts of the upper plate as well as the adjusting bushings are loosened so that they no longer rust on the upper plate.
The pressure screw (M20) is screwed as far down as possible by hand against the plate.
Then screw down all fastening bolts (M10) of the plates. Tighten by spanner first the fastening bolts, then the adjusting bushings.
Open the plate and remove the strips/shims.
*Note : If it becomes evident in production that the wafer thickness has a slight deviation each wafer sheet must be measured. Any deviation can be readjusted.
Note : It may be necessary to adjust the locking handle pressure after any such adjustments
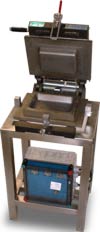 WT 1 Special
 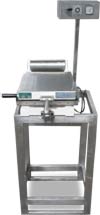 WT 1 Standard